How to use Dowsing / pendulum charts generator
Table of Contents
Demonstration video
Create a dowsing chart
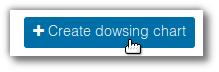
To start, it is possible to create a new chart, click on... (drum roll)... " Create a dowsing chart "
 The application then prompts you to name your chart.
Modify a dowsing chart
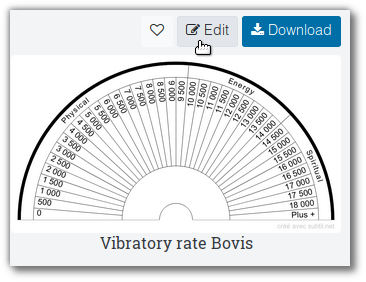
You like an existing chart, you would like to make some modifications.
From the dowsing chart detail page or list, click on " Edit "
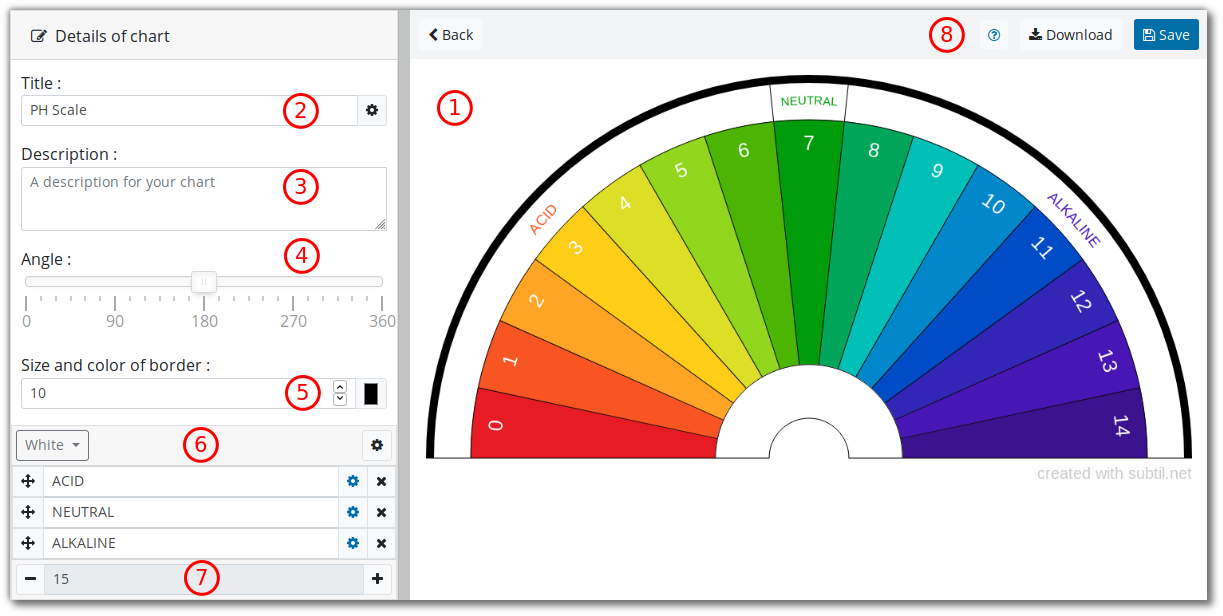
Presentation of the interface
-
Previewing
Allows you to check the result of your customizations. -
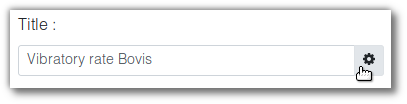
Title
This is the name that your dowsing chart will be called -
Description
Allows to provide a text presenting for example the questions to be asked with this chart, this field is used for searching. -
Angle
Modify chart angle from 90° to 360° for a full disc. -
Border
Choice of the color of the chart lines and setting of the thickness of the outer edge. -
Groups / Elements
We will discuss the notions of group and customization later, in this list you fill in the text displayed in the elements of your chart. -
Number of Elements
To change the number of elements use the " " and " " buttons or click on the field containing the number of elements a dialog box will prompt you to directly enter the number of elements you want. -
Action buttons
Download the image of your dowsing chart, or save it on subtil.net (requires a user account).
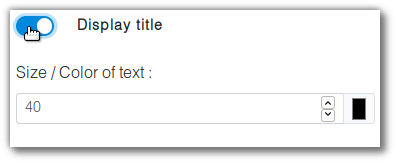
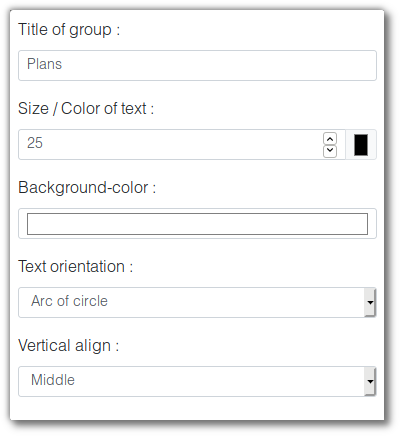
Title customization
You can display the title and customize it by clicking on the button " "
 And then define the size and color of the text:
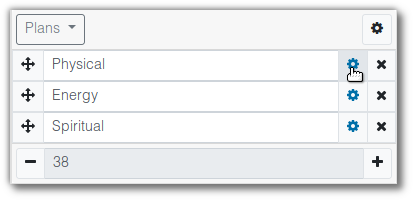
Reorder elements
Clic on " " to drag and drop the element above or below.
Customization of elements
All elements
All items can be customized by opening the group customization menu by clicking on the " " button:
 Here are the proposed choices:
- Group title (only displayed if several groups)
- Font size and color
- Background color
- Text orientation: "Arc of circle", "Horizontal" or "Vertical"
- Vertical alignment of the text, only if the orientation is "Arc of circle" or "Vertical"
A particular element
The application also allows you to customize an element individually, for this you must open the menu of the element by clicking on the button " ":
 A switch to enable the customization of the element, if the element is customized the icon turns blue " " it will then be independent of the customizations made on the group.
 The menu displayed is almost identical:
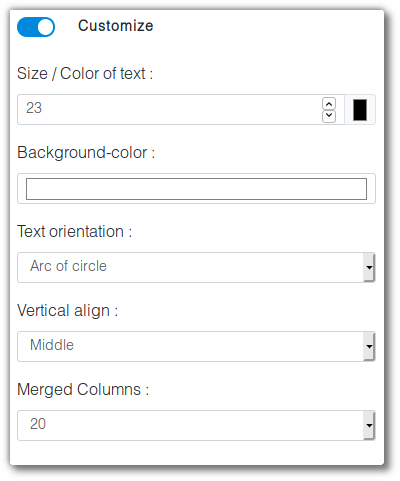 The additional option "Merge columns" (spreadsheet users (Calc, Excel, ...), this probably reminds you something... no? ),
A column can be merged with its neighbor(s) in order to be displayed larger. The list allows you to choose the number of columns to be occupied by the slice being edited.
The additional option "Merge columns" (spreadsheet users (Calc, Excel, ...), this probably reminds you something... no? ),
A column can be merged with its neighbor(s) in order to be displayed larger. The list allows you to choose the number of columns to be occupied by the slice being edited.
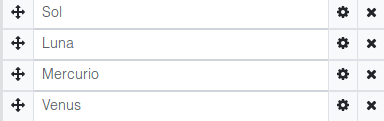
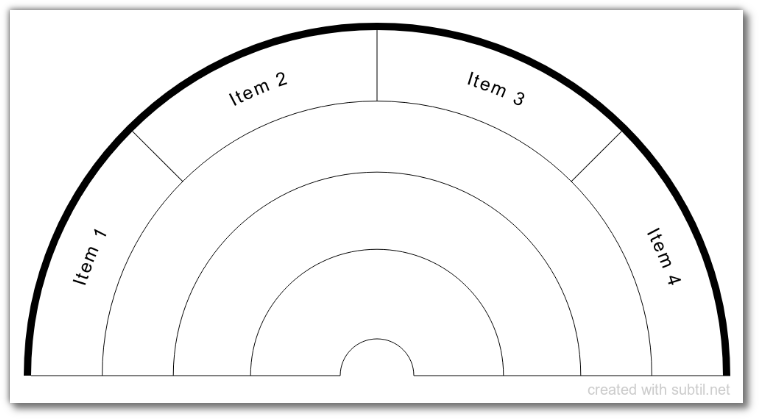
The groups
The groups could have been called sub-tranches or lines. Below is an image with 4 groups (a chart in a chart, in a chart, in a chart, in a chart  )
)
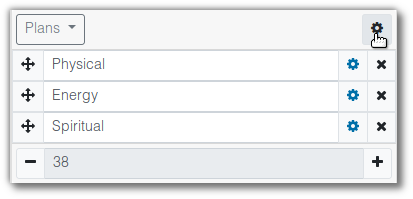
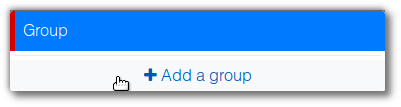
Add a group
To add a group, open the drop-down menu:
 Then click on " Add a group "
Modify a group
In the group management menu, the " " and " " buttons allow you to change the order of the groups,
and traditionally the " " button will delete the group.
The slider at the bottom allows you to adjust the width occupied by each group, the colors on the slider are used as markers with the group borders.
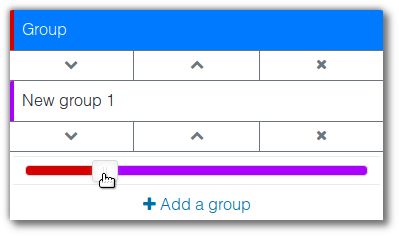 The group whose label is on a blue background, is the group being edited, to modify the content of another group click on its label. It will then be selected, the menu will close,
making it possible to modify the elements of the component.
As soon as there is more than one group, in the group customization menu " ", the form proposes to change the group label.
The group whose label is on a blue background, is the group being edited, to modify the content of another group click on its label. It will then be selected, the menu will close,
making it possible to modify the elements of the component.
As soon as there is more than one group, in the group customization menu " ", the form proposes to change the group label.
Download / Register your dowsing chart
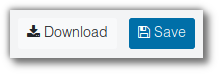
Download
Simply click on download to retrieve the image in "PNG" format of your.
Save
You can also save your creation on the subtil.net website, so that you can modify it later. To perform this action you must have or create a user account.
Share
You are satisfied with your creation  , we invite you to share it with all users of the site, for this you must have a user account and have saved your dowsing chart.
Once connected, new actions are proposed:
, we invite you to share it with all users of the site, for this you must have a user account and have saved your dowsing chart.
Once connected, new actions are proposed:
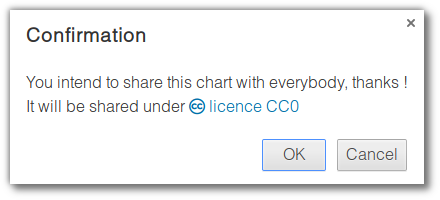
 Click on " Share " and confirm the sharing under licence CC0 (a public domain equivalent).
Sharing is moderate before being published, an administrator will validate and classify your dowsing chart before it appears on the website.